This is a writeup for the room Linux Fundamentals Part 2 on tryhackme
You can read part one here Linux Fundamentals Part 1
Make connection with VPN or use the attackbox on Tryhackme site to connect to the Tryhackme lab enviroment
The Tasks
Task 1:
Press on deploy to deploy the VM connected to this room after reading the task. Press complete on both questions after reading them. No answers are needed. Once deployed make note of the IP as you need it to connect to the machine from your terminal
Task 2:
Read all that is in the task and press complete
Task 3:
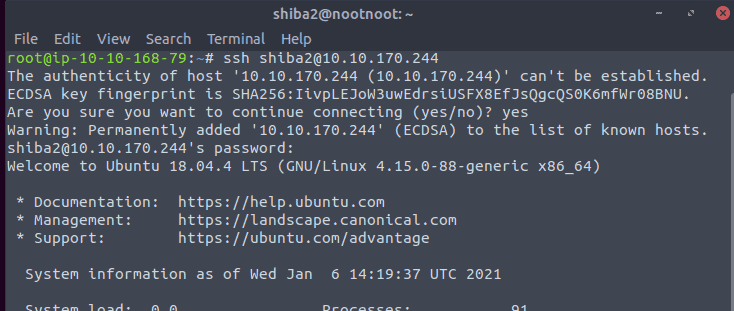
Read it and connect to the VM. In the assignment they use a windows machine with putty installed on it and second is by using the ssh command in Windows. This command is the same in Linux. We are using kali Linux from Tryhack. In this case open an terminal and make the connection. Chang the IP to the IP that is provided in the task
Task 4:
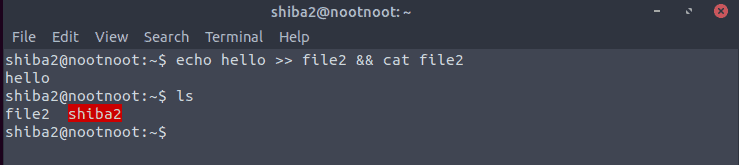
Read the task and note that echo hello >> file2 && cat file2 means put hello into a file called file2 and put the output from file2 on screen. Once done press completed to continue
Task 5:
Read all that is in the task and press complete
Task 6:
Read the task. The answer of the first question is in the last screenshot. We just need to change the test
export nootnoot=1111

The second answer can also be found in the same screenshot. Let’s put the command echo $HOME in the terminal

You can now copy and paste the answer

Task 7:
Read all that is in the task and press complete
Task 8:
Read all that is in the task and press complete
Task 9:
The answer of this question can be found in the last screenshot. You just need to edit the command to fit the question. Also note that > will replace a file if the file is already there

Task 10:
Read the task and press complete, However please remember that >> appends to a file while as we learned in task 9 > overwrite the content
Task 11:
First we need to set the variable test1234 to the same value as $USER
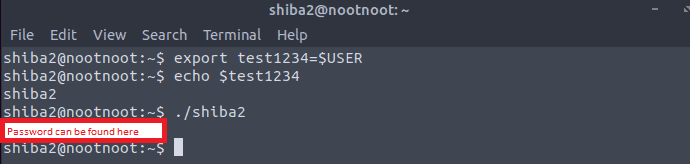

Now use this password to login as shiba3
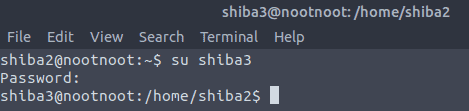
For the next tasks use the shiba3 account
Task 12:
Read all that is in the task and press complete
Task 13:
Read all that is in the task and press complete
Task 14:
The answer of the first question can be found in the last screenshot
chown paradox file

The answer of the second question can be found in the text after the first screenshot

So for the answer on the 3rd question we type man chown in the terminal to look for the recursive operator


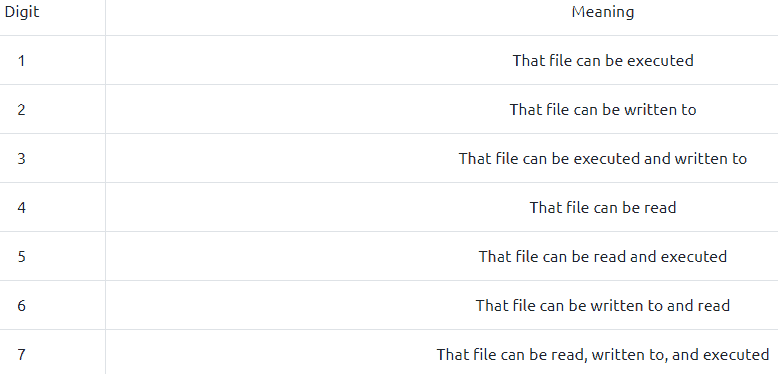
Task 15:
Read the task and note the tables
Let’s tear down the first question in order to understand rights
- User= read
- group= read and write and
- All= can not do anything
with this we can take the table and just walk trough it
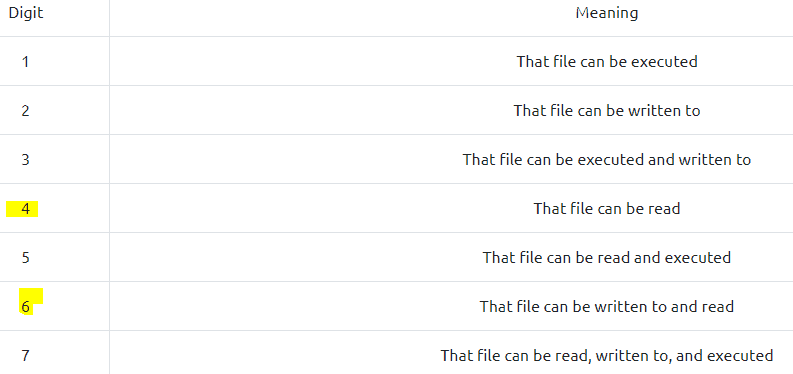
And as we have learned 0 is for no rights at all

Second question
- User = Read write and execute
- Group = Read,write and execute
- All = Read,wrtie and execute

Task 16:
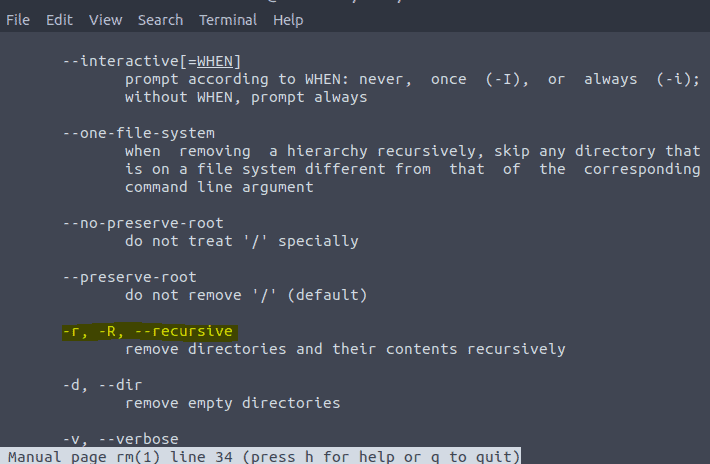
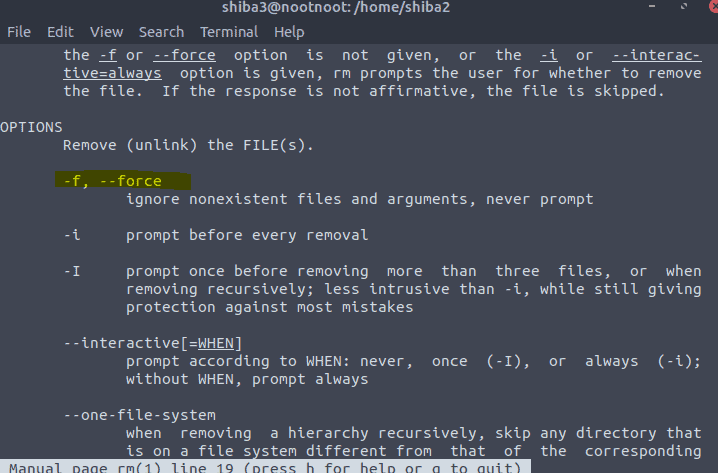
For both answers we type in the terminal man rm


Task 17:
The answer can be found in the first line of task 17

Task 18:
Read and press Complete to finish the room
Conclusion of room Linux Fundamentals part 2
We have learned the following commands
- ssh – Remotely access a machine
- chown – Edit file permissions
- chmod – Set different permissions on a file
- rm – Remove files
- mv – Move files
We have learned about operators
- && – and
- & – run a command in the background
- $ – denote environment variables
- | – pipe
- ; – run multiple command. If first command does not run it will still run the next one after the ;
- > – Add to a file
- >> – Append to a file
And we have learned about file permission.